Saturday, August 1, 2009

Roadtrip Ramblings


Texas has over 150,000 of surface roads (well, that is according to Wiki), and we always seem to take the ones that have been less traveled. We like it that way. We are so lucky to live in a state that encompasses it all. Go East, we have the great Piney Woods. Go South, we have the great Gulf Coast. Go North, we have the prairies and lakes. Go West, we have the wide open spaces and the gateway to the last frontier. I really love each direction and never grow tired of hitting the road for a day or two.

This particular trip led us to Buffalo Gap, one of the last places that the mighty buffalo roamed. I had to go there on museum business but as always, I try and make it a nice getaway for a day or two from the farm routine. My cowboy artist, always up for an adventure, eagerly mapped out the most scenic route.

The night before our trip, wild weather once again struck the farm. The storm began rumbling right before midnight and by 3:00 a.m. I was wide awake and fumbling for flashlights. By 5:00 a.m. myself, my guy & our four dogs were riding it out in the closet while the cats had to stick it out in the other room (they get their own closet).

Two hail storms and one, possibly two tornadoes later, we emerged unscathed only to find that our property had not fared as well. The reason for no power was because two electric poles were now almost horizontal to the ground. The light pole that is located by our water source was now wrapped around the pump station like a tongue tied cherry stem,this solved the no running water mystery. Several of our old oak trees were sheared off at the top and their trunks and branches lay all over our cross fencing. One old shade tree in our front yard split completely in two and it was dangerously close to taking out our security fence around the farm house.

The heirloom garden was completely devastated and my beautiful okra and tomato plants which had given us such a bounty, were now laying forlornly on their sides all battered and beaten by the hail.

The barn and art studio lost more of their roofs (we had not replaced them yet from the last bout of wild weather) but at least all the barnyard animals were safe and all accounted for.

We came very close to canceling the trip but the thought of an all expense paid for beautiful bed & breakfast WITH electricity and running water was just too good to pass up for the night. We thought long and hard about it but in the end, we made our decision. My knight in blue jeans got out his chainsaw and began chopping furiously as I scrambled to pack and get the animals secured for a 24 hour period.

Without a backward glance (almost, I did have to check and re-check all our pets and livestock) we took off down the road, as we knew that a good nights sleep awaited us at the other end...so what if it was half way across Texas and we would have to be back by the next evening and tackle all the storm damage that awaited us.

One thing I have learned living here on the farm....NEVER pass up a chance to change up the routine and the work will ALWAYS be here waiting for us when we get back.

The other thing I have learned is to always take the road less traveled...you never know what you might see, and , you have a better chance of seeing it if you are on a two lane road instead of a super highway!

Tomorrow we leave for Austin, and yes, we will be taking the long way....

Thursday, July 9, 2009

Heritage Homestead Preserving More Than Just Fruits and Vegetables


As my garden grows, so does the bounty and the dilemma of what to do with it all. So, I decide to tackle the art of canning and preserving, how hard can it be? Well, after reading several books on the subject, the realization hit me that if I made a mistake while attempting this I could cause illness or egads...botulism. Canning and preserving involves some basic science as does baking, and I am not the best baker.

My mom's family were not only excellent bakers but also extremely noted canners and preservers. My Choctaw Indian great-grandmother was known for her beautifully preserved crab apples and her canned fish. According to family lore, my great grandfather was quite a fisherman and would travel to places like Yellowstone and beyond to fish for rainbow trout and salmon. The family could not eat all of the fresh fish at once so my great grandmother would prepare it and cure it by canning it. It was a special treat for the family in Texas where catfish ruled the special occasion dinner table, salmon and trout were apparently, quite exotic.

My cowboy's ancestors all canned here where we live too. In fact, there is an old shed that still stands on one of his cousin's properties that still holds some of his great aunt's jars from way back. While exploring this old shed, we were still able to distinguish summer squash that had been canned over 20 years ago.

Until our fast food nation and mentality took over, canning and preserving if not taught by a family member at home, was taught in school or by a local county extension agent. During World War II when victory gardens were at their peak, community canning centers began popping up throughout the Country. Women would bring their garden fruits and vegetables and utilize the equipment at the center. It was a social event much like quilting or sewing clubs of the day. For canning at home, there would be a wood burning stove placed outside or on a porch since the boiling and steaming could go on for hours, depending on the amount of food to be processed.

After some internet research, I came across some homesteading courses that are offered in Texas only an hour away from our farm. Homesteading courses have gained popularity with the decline of the economy and the rise of healthy eating and the popularity of the slow food movement.

Heritage Homestead is a Christian based community located just outside of Waco in an area known as Chalk Bluff. The 510 acre working farm named "Brazos de Dios" along the banks of the Brazos river, is home to 30 families. The majority of the buildings and structures are salvaged log cabins, barns and mills brought piece by piece from around the United States and lovingly restored with historical accuracy but incorporated with hidden modern conveniences (AC, plumbing, electricity).

As soon as you drive through the community you are struck by simplicity, orderliness and the balance of modern and old fashioned rolled into one. Heritage Homestead is self sustaining and self contained, producing: natural pastured meat, organic vegetable gardening and orchard production, dairy barns, gristmill etc. They are also master metal forgers, furniture makers and builders.

Each and every building and surrounding gardens reflect their heritage. I arrived at the cooking center, which to my delight was partially housed in a beautifully restored two story 1800's log cabin from Missouri (with a modern commercial kitchen building hidden behind). I was greeted by a very nice woman in her 50's who was the lead instructor, accompanied by four other young women (one being her daughter)to assist with the class training. Two of the young women, Jessie & Rebekah would be doing the actual teaching on this day. They had been canning since childhood - this type of cooking method was as natural to them as popping in pre-fab food in a microwave to us.

The class size was just right, nine participants of all ages and all walks of life (from housewife to Austin restaurateur & caterer)surrounded the log cabin hearth as we listened intently to the instructors. From there we went through the antique doors and stepped into a very modern day large kitchen facility. Everyone took their place at the amazing butcher block work table that faced the stoves and ovens. As we learned the ins and outs of this lost art, and I can honestly say, it is a lost art - we bonded and assisted each other with the various steps. My mind immediately conjured up images of those old community canning centers and for a moment, I felt deeply connected to the past.

Our course began early in the morning and did not finish till late in the afternoon with a much needed lunch break at their on site deli and bakery. It is not often that you get to eat homemade bread, grass fed beef, handmade cheese, fresh squeezed lemonade and freshly made ice cream all in one meal all produced at one location.

By the end of the day, I had successfully canned or preserved the following: grass fed beef chuck, pinto beans, green beans, tomatoes, peaches, jalapenos, strawberry preserves and cabbage for sauerkraut. Now, I can safely say "of course I CAN"!

As stated earlier, there is a real science to canning, after learning the basics, you can add your own flare and touch to your canning recipes and arrangement of the food within the container. Learning from a professional (be it a homesteading course, family or friend) is essential for this particular craft. These skills are handed down through centuries and are honed to perfection by places such as Brazos de Dios and Heritage Homestead.

As time and money permits, I will be returning to the homesteading school to learn other essential craft and agrarian homesteading skills. Some of those courses include bread making, soft and hard cheese making, handcrafted soap making, organic gardening etc. There is a profound purpose and sense of accomplishment in rediscovering and mastering these skills. One of the best rewards possible is to taste the fruit of fulfillment and accomplishment and getting in touch with my own heritage.

Thursday, July 2, 2009

Personal "Victory" Garden - How To Get Started


The reality is that almost half of my life was lived in a high rise overlooking the Atlantic ocean. The closest I got to a garden was walking by the potted plants in the entry way of the lobby of my childhood building.

Gardening was not really a part of my vocabulary. I did love driving through the sugar cane fields in Brazil when I was a child and the many farming communities when visiting Texas. But at the time, I had no idea that I would be living that life one day.

Fast forward to 2009 - now living in Texas on a farm that once yielded large crops of watermelons, peanuts, purple hulled peas, cotton, corn and other staples. In the 50's the farm switched to Brahman cattle due to the government cotton credit program.

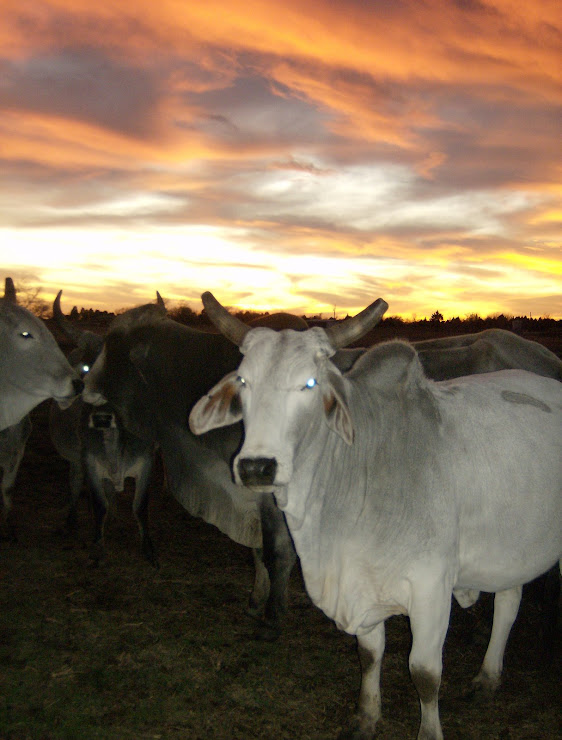
My artist cowboy's family has carried on the tradition of raising registered Brahmans but due to their temperament and size have become less popular in recent years. I love all of our bottle fed Brahman babies but as the economy continues to spiral downward, we have chosen to revert the cattle ranch back into a working farm with some small profitable heirloom crop production and possibly an agritourism location in the near future. Feed Me Farms will one day feed the mind, body and soul!

In order to achieve our long term goal, we decided to plant a "test" garden to see what would grow well. We took our inspiration from the victory gardens of the 1940's.
The term "Victory Garden" was coined during World War II, when food was being severely rationed. The U.S. government began a campaign for Americans to grow their own fruits and vegetables.

Americans heeded the call out of necessity and victory gardens began cropping up in the new urban areas, places where people had lost touch with living off the land. Magazines and newspapers featured articles on vegetable growing, canning and preservation at home. Beautiful, whimsical posters and artwork were part of the campaign, many depicting patriotic images and vegetables, hand in hand.

History repeats itself. Newspapers, magazines and television news have been covering stories about home gardening, CSA's (Community Supported Agriculture) and local farmers markets. Even Leisure Learning, a Houston adult continuing education program has really jumped on the train. Once upon a time it was full of stock market and real estate classes but on the cover of the latest issue it touted backyard chicken and goat tending. Publications such as Mother Earth News, Grit Magazine and Hobby Farms are having a renaissance of sorts...as many newspapers and magazines are witnessing a decline, these publications readerships are growing on a daily basis.

I am happy that we are a part of this. There is nothing more satisfying than watching a little seedling take root, grow and bloom, then ultimately bare a fantastically tasting fruit or vegetable. I have lost all interest in purchasing massed produced food from supermarkets. Their waxy evenness is almost creepy. Our food sources have all been polluted with genetically modified seeds, massive amounts of pesticides and flavorless fruits and vegetables all in the name of progress.
One bite of an heirloom tomato will have you begging for more locally produced food and possibly inspire you to provide for yourself - even if you did grow up in a high rise! Yes this is my personal "victory".

How to Plant Your Own Victory Garden:

1) Start small, even if you have many acres to play with. Support companies who provide only non GMO (genetically modified) seeds. My absolute favorite company is Baker Creek Heirloom Seeds @ www.rareseeds.com
Their catalog is not only beautiful but very educational. They offer heirloom seeds from around the world. I had almost 100% germination with their seeds. I boycott companies that are associated with Monsanto (GMO) seeds. Most of the seed companies sold in major stores like Home Depot, Lowe's and Walmart are NOT very good and many are flavorless.
2) Do not be afraid, just jump in. I was so hesitant and indecisive that it actually took me weeks to finally plant one seed. I read so many gardening books that I eventually got overwhelmed with information. I go back to the "kiss" philosophy (keep it simple stupid).
3) Do keep a journal, it really helps to keep things organized. I made my own gardening book. I titled pages with planting dates, first sprout dates, first harvest and last harvest dates. I also keep track of significant occurrences such as frosts, rain, drought conditions, pest invasions and lack of germination (possible reasons). Make a diagram of the garden and keep track of where you planted what. This will help if markers are washed away and will help you rotate for next year.
4) Prep your soil but do not overthink the process. Our ancestors grew tons of crops with little intervention and so can you. We use all natural fortifiers for our soil. Compost, fish emulsion and other natural infusions.
5) Do smother weeds or grass before planting. The easiest way to do this is with newspapers and tarps, allow a few weeks for the area to wilt and die and then begin working the soil. If you are doing raised bed planting then this is not a big issue.
6) Do not be afraid to plant the seed directly in the ground, especially if you live in the South. You do not need a fancy greenhouse to get those little seeds started.
7) Pick fruits and vegetables that you like and will eat. It is also important to picks seeds that are known to flourish in your climate.
8) Have fun with it, don't be upset with a few small failures. The big victories are well worth everything!

Wednesday, July 1, 2009

Oven Roasted Tomatillo Salsa


Tomatillos have taken off in our heirloom garden. Two varieties have both grown equally well. My tomatillo verdes yielded rich, vibrant green fruit. The big surprise was the Purple Coban tomatillos, a native mountain variety from Guatemala. The Purple Cobans are a lush, purple and green mottled fruit much sweeter than expected. When roasted, they become even sweeter.

Tomatillos are thought to have grown wild in the Andes mountains eventually being domesticated by local tribes and then spread to other South and Central American cultures such as the Aztecs. Tomatillos are often confused with green tomatoes but are very different in both texture and flavor. Tomatillos are a member of the nightshade family but are closer to a gooseberry than an actual tomato. When ripening on the vine, a husk evolves first protecting the tiny fruit bud until it matures and breaks through the papery skin. The husk is almost the size of the full grown tomatillo throughout the growing period of the fruit itself. Tomatillos are ready to pick when the fruit catches up to the size of the skin and can be seen peeking through.

Salsa is now in the top five condiments of the U.S. right up there with ketchup and Tabasco. The name "salsa" most likely was given by the Conquistadors for the concoction of chilies, tomatillos or tomatoes used by the indigenous cooks of Central America.

*****culinary tip - tomatillos have a sticky, soapy residue between the husk and the fruit. Fill a sink with cold water and rinse the tomatillos twice to remove all the residue. I made this for a pot luck dinner party to serve with my homemade carnitas cornbread casserole, so I was cooking for a crowd. This recipe can be easily halved.

Oven Roasted Tomatillo Salsa:
40 tomatillos
8 to 10 garlic cloves
4 Poblano peppers
2 to 4 fresh jalapenos or serrano peppers
2 1/2 cups of coarsely chopped onion
1 cup chopped cilantro
olive oil
sea salt (to taste)

Set oven to broil.

Place all the ingredients except for cilantro, olive oil and salt on rimmed cookie sheets. Roast all ingredients until the tomatillos begin to burst and caramelize and the poblanos get very dark and their skins begin to separate. Keep turning all the vegetables until all sides are roasted.

Remove poblanos and place in zip lock bag. Allow to sweat, then peel off the roasted skin. Add back to the roasted vegetable mixture.

Allow for the roasted vegetables to cool slightly, begin scooping the roasted vegetable mixture into a large capacity food processor, be sure and add all of the juices from the roasted vegetables. Add a handful of cilantro and process. Continue this until all roasted vegetables and cilantro have been processed.

Add sea salt to taste and a bit of olive oil for consistency. Best if made the day before and allowed to sit overnight in refrigerator. Can be reheated or served cold.

* Can also be combined with Crema Mexicana for a beautiful green cream sauce.

Monday, June 22, 2009

The 3 F's of Small Town Texas: Fairs, Family Reunions & Funerals


We have had quite a week and I apologize for not posting sooner. We had the three major F's happen - the fair, two funerals and a family reunion. All involved the big fourth F - food!

I can honestly say that many chickens (not mine) were sacrificed for these three East Texas rituals. Believe it or not, we had fried chicken at all four events. We also had plenty baked ham, fresh corn pudding, barbecue brisket, corn bread, purple hulled peas, homemade tamales, cakes, pies and lots of homemade ice cream.

All of these F's lead up to another F - Fat!!! We may need to add just one more F to the list this next week...fasting!

There is something very comforting knowing that the County Fair happens every year the third weekend in June. The fair celebrated it's 89th year in 2009. This is only my second year to attend but with every year that passes I get more involved. This year I entered some photographs in the home economics competition.

The fair always kicks off with a large parade. The parade floats are elaborate affairs that locals work on for months. Every year there is a different theme, this year was "Country Paradise". There were a lot of grass skirts and cowboy hats (now that's a combination). There were also plenty of duded up horses, tractors, motorcycles, all terrains, golf carts and antique vehicles.

Have I mentioned that my cowboy happens to be a well known art car artist? Well, he is. He has been making art cars since the 90's.

The "Yellow Rose of Texas" is a 1990 Cadillac that is covered in rhinestones and depicts famous Texas icons such as bluebonnets, longhorns, oil derricks, the Alamo and of course lots of yellow roses.He made this particular car for his mother's 60th birthday (over ten years ago). It took over 400 hours and 10,000 rhinestones to create.

This is by far, one of the most famous of all Texas art cars. It has won the Houston Art Car Parade and has been featured on shows such as CNN, Good Morning America and CBS Sunday Morning. It has graced the pages of Texas Monthly, Heritage Magazine and Texas Highways. It was on the cover of the Austin Travel Guide. The "Yellow Rose of Texas" garnered so much attention that it was chosen to be in the "It Ain't Braggin' If It's True" opening exhibit of the Bob Bullock Museum at the Austin State Capitol. It proved to be the most popular item in the museum. It was invited back twice and has a real place in Texas memorabilia.

Now it is on permanent exhibit at our local County museum (which I happen to be curator)instead of just being stored in the barn and we drove it in the parade as the museum entry. It is always a huge crowd pleaser! The kids all call it "The Bedazzled Car".

The parade winds it away around the old downtown square and courthouse, then goes straight down Highway 84 (which they close for the event) and ends at the fairground. It is amazing how many people stand in the Texas summer heat to cheer on their favorites. The sense of community really comes alive at this moment.

Many of the first settlers of the area have permanent camp sites at the fairgrounds and spend the preceding week decorating them with different themes. There is anything from feed sack, horseshoe and chili pepper motifs to patriotic themes that represent Texas. There are even a few confederate flags that fly, after all this is Texas, and the fair grounds are actually the Confederate Reunion Grounds.

Usually, we spend the entire week enjoying the animal judging events, concerts (Country, Bluegrass & Gospel), rides, food booths, cow patty bingo and the rodeo. Our camp has one of the best locations, it's right across from the concert pavilion, and at the gateway to the food booths and the Midway. All of my cowboy's friends, family and town characters stop by. We end the weekend with a family reunion and a late night at the camp telling tall tales and sharing a bit of days gone by.

This year was a little different as two members of my cowboy's family passed away during the festivities. It was a blessing for both. His grandmother was 93 and had been in a nursing home for many years, his eldest cousin had been ill for several years and her quality of life had been greatly diminished.
Both funerals were a celebration of life with lots of family, food and friends who gathered to pay their respects.

His grandmother (Memaw) was the best beautician in town and owned her salon for over 40 years. Everybody knew her, including the young funeral director who handled the arrangements. He added a photo to her photo montage of him as a baby, getting his first hair cut and Memaw was giving it. He was sitting on a two by four across the barbers chair because he was so tiny. My cowboy said , he too, remembered that two by four well. It was a touching moment and made me think how wonderful it is to live in a place where your life and death can touch so many. She was buried beside her husband in the family cemetery that was started by his family in the early 1800's.

Memaw's favorite treat was homemade ice cream. Even in the nursing home, we always gave her a bit of soft serve ice cream after her meal. Before her body faltered and her memory faded, Memaw made homemade ice cream all the time for her three daughters and her grandkids. Grandad and Memaw would make them homemade peppermint ice cream and they would have a good old ice cream social.

My parents and grandparents would make hand cranked ice cream for us every summer too. I can still remember the old wooden ice cream maker with the ice and bags of rock salt, later on they got an electric one but it still had the wooden barrel. It was a White Mountain brand, which has been around for over a hundred years (although I think Rival owns them now). I may be adding one to my farm wish list for future fair use.

Both my mom and grandma were awesome Southern cooks and they would make us homemade custard ice cream, this process involves fresh eggs and cooking the cream mixture to a very soft custard stage before freezing it. It adds a depth and richness that uncooked ice cream just cannot duplicate. My mom always adds in different fruits like peach, blueberry, blackberry or even fresh coconut but I like those but my favorite is just pure vanilla bean.

Here's a recipe in honor of Memaw (1915-2009) and my Grandma (1915-1996), I know there are plenty of ice cream scoops in the great beyond! Their ice cream socials live on in our hearts!

Homemade Vanilla Bean Custard Ice Cream


This is a picture of our County Fair Campsite, the fair has been going on since the late 1800's in one way or another. My cowboy's sister & mom love to decorate the campsite every year in a patriotic Texas theme. The family has had a permanent campsite for over 80 years at the fairgrounds. The fairgrounds were organized originally as a Confederate Reunion Camp Ground and it still bears that name today.
My cowboy's ancestors had a campsite then too! We like to make our own ice cream but usually only make it for one night and the fair actually lasts for an entire week. Our county is famous for its peaches, so we buy home made peach ice cream from one of the food booths. The booth is run by a local family and they sell out every night, it is one of the most popular items at the fair. I like to think that many generations have sat down to eat a bowl of homemade ice cream a time or two in this wonderful campsite under the old oak trees.

Homemade Vanilla Bean Custard Ice Cream:

3 farm fresh eggs, beaten
1 1/2 cups of organic sugar
4 cups whipping cream
2 cups whole milk
1 vanilla bean
1/2 teaspoon real vanilla
sprinkle of sea salt (tiny pinch)

1)Beat eggs in a medium size bowl and set aside
2)Combine sugar, cream and milk in large sauce pan
3)Add the entire vanilla bean whole and a tiny pinch of sea salt
4)Heat the cream mixture until the sugar is completely dissolved, be sure the mixture is on very low heat and never boils. It is necessary to stir almost constantly.
5)Remove one cup of the warm cream mixture and the whole vanilla bean.
6)Slice the vanilla bean lengthwise and scrape the tiny beans back into the cream mixture. discard the bean pod.
7)**This is the most crucial step, be very careful that the mixture has cooled slightly before mixing it in with the eggs or it will scramble or curdle and ruin the texture**Begin stirring the eggs constantly, slowly pour in the cream mixture
8)Slowly add back in the egg & cream mixture to the rest of the cream mixture in the sauce pan. Add a half teaspoon of vanilla. Stir constantly.
9)Allow the egg & cream mixture to cook on very low heat until it coats the back of a wooden spoon (the temperature should reach about 170 and can be tested with a candy thermometer)
10)Remove mixture from heat and place in large Pyrex bowl, allow to cool at least 4 hours in refrigerator. For best results allow to cool overnight.
11) Skim off any pudding like skin and place the rest in your ice cream maker. Follow your ice cream freezer instructions

This mixture makes a wonderful base for fresh fruit ice cream too. Seasonal fruit such as peaches, blackberries, fresh coconut or strawberries can be added during the making for a wonderful summer treat.

Thursday, June 11, 2009

Clicking My Heels For Joy! or How To Train a Baby Donkey


I am clicking my heels and my training "clicker" with joy of the birth of my first miniature Mediterranean donkey here at Feed Me Farms. I fell in love with these energetic little creatures while visiting Sicily in 2003. I had encountered them in a little mountain side village named Floresta near the Mt. Etna volcano. I only saw them from a far but it was love at first sight for me.

Donkeys have been domesticated for over 5000 years and come in all shapes and sizes. With the help of modern day DNA testing it is now widely accepted that almost all donkeys are descendants of the African Wild Ass. Some of the first evidence of domestication was found in an Egyptian tomb where 10 donkeys were buried with full regalia along with a long forgotten king.

It is believed that ancient Egyptian merchants sold or traded asses to other ancient cultures thus populating the Middle East and Mediterranean with this wise and revered pack animal. Damascus, was once known as "The City of Asses", obviously because of one of it's most famous commodities.

Mediterranean or Sicilian donkeys are famous for their distinctive markings. Most have a prominent cross like marking across their back and shoulder. It is said they were given this mark for having been so faithful and loyal to Jesus. They are always featured in the traditional manger scene.

Closer to home, we had been waiting since early Spring for this little bundle of fur to arrive here on our Texas farm. We acquired 3 little Sicilian donkeys at the beginning of the year to keep our first bottle fed calf, ZZ Topinha, company. We bought an adult Jack, Jenny and their one year old Jack offspring (it was a package deal, donkeys are notoriously lonely without companions). We named them Billy, Frank and Dusty in homage to the band ZZ Top. When they were delivered we noticed Dusty was either really, really well fed or pregnant. Well, pregnant she was and getting bigger and bigger day by day.

We waited and waited and WAITED...I had no idea that a Jenny can be pregnant for 360 to 375 days!!!! Can you imagine if a human had to carry a baby for over a year! All of our friends and family would ask "Have you had that baby donkey yet?". My standard response became "Not yet, but I swear it has to be any day now".

One afternoon a little over a week ago, I walked out to the side pasture to visit and to my surprise, there was an extra set of ears slowly making their way through the tall grass. I started yelling for my cowboy, I was so excited I tripped and fell in cow manure but did not even notice (until later when I tracked it all over my hardwood floors).

We named her Pearl, again a little reference to ZZ Top...just think, the next one will have to be named "Tush" !

How to "clicker" train a donkey:

1) Clicker training can be used with any animal. An inexpensive clicker can be picked up at any big pet store for less than $5. It can be one of your best investments on the farm. I use it for training the calves, chickens, Guineas and the donkeys.

2) Use the clicker in conjunction with treats or food. Animals of any kind are always more motivated when there is a little bribe of food involved. I use carrot or apple baked biscuits for the donkeys and calves. They love both.

3) Stand at the gate entrance or barn entrance and call out to the young donkey. Click as loudly as possible with the clicker. As the donkey approaches kneel down and continue to click until the baby comes up to you. Reward with a treat and plenty of petting.

4) If you want to teach them to follow you anywhere, make the clicking, treat reward, clicking into a game. Click a few times, get them to follow. Once they begin to follow you, reward with a treat or a pat on the head. Pretty soon, the clicker may no longer be needed but sure comes in handy if they are far off in the pasture!

happy hour @ FMF

happy hour @ FMF
party till the cows come home